Material menu
In the Material menu you can find the items New, Delete, Edit, Search and Compare.
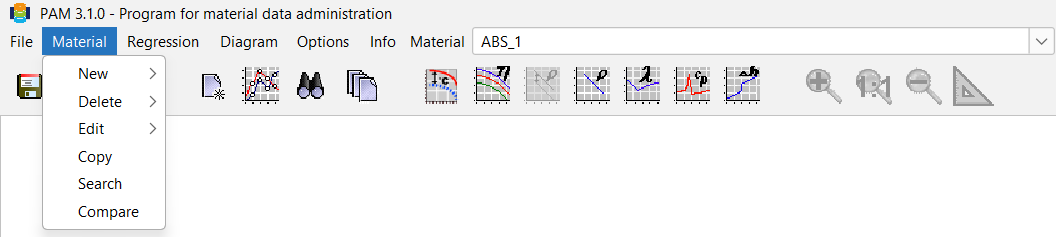
Define new material
Definition of Material Types
In order to organize material, PAM uses material types. If the desired type of material (e.g. HDPE, PP, PA, ABS…) is not included in the database, it needs to be defined first. In order to do this, select Material Type in the Material > New menu.
A dialog Create Material Type appears where the type of the material can be defined. To do this, enter the name of the type (either polymer or filler) and in case of polymers see whether the material is amorphous or partially crystalline.
To define a HDPE enter the following data:
- Name: HDPE
- Kind: Polymer
- Structure: partially crystalline
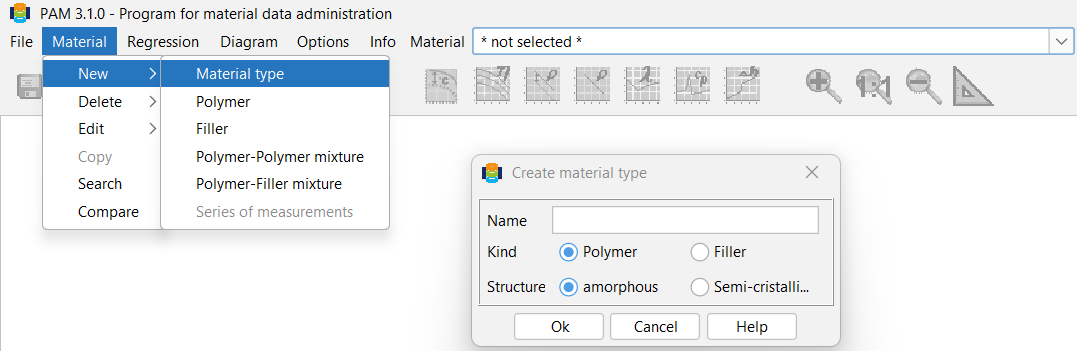
Pressing the OK button will add the new material type to the database.
Input of new Material Data
In order to enter the data of a new material select the menu Material > New. Here you have to select between four options:
- Polymer
- Filler
- Polymer-Polymer Mixture
- Polymer-Filler Mixture
The required kind of material needs to be clicked on and then the corresponding input mask for material data will appear (a pure HDPE is e.g., a polymer and this shall be clicked on).
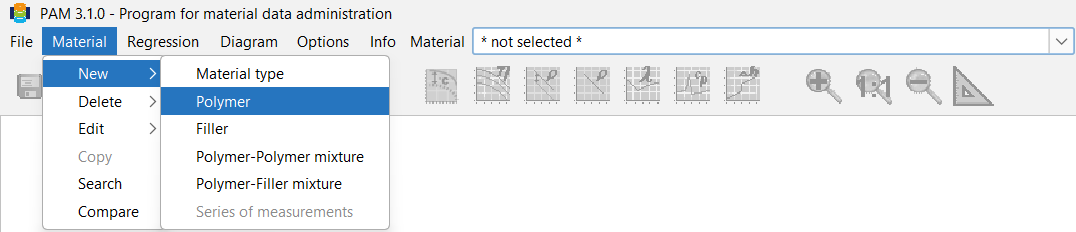
In the General Tab for polymer materials you can find 6 tabs:
- General
- Thermodynamics
- Density
- Rheology
- Technology
- Tribology
General
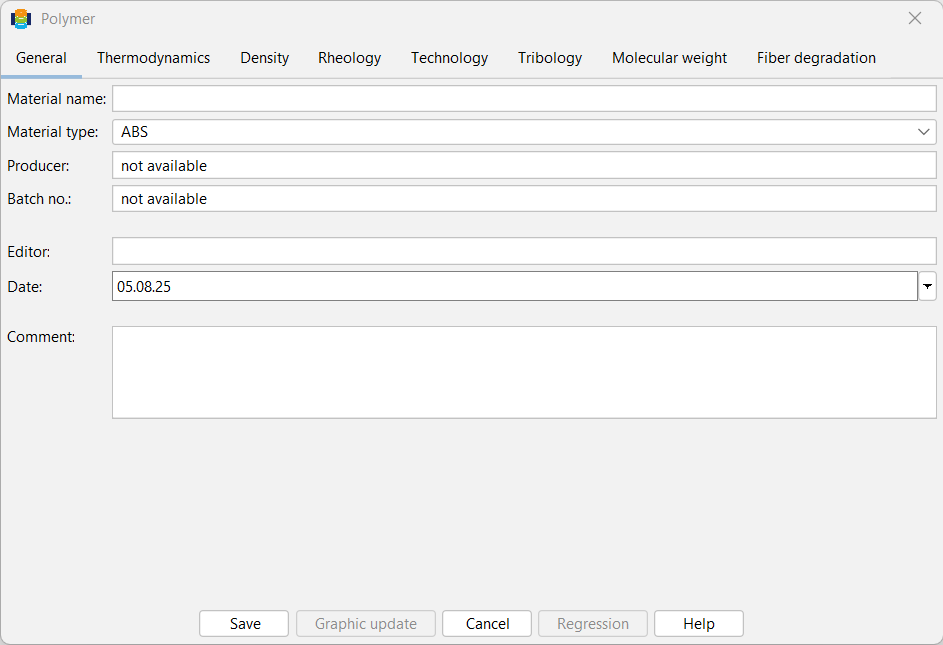
The tab General contains all the general data. This is the complete name of the material, the material type, the name of the editor and a batch number. A more extensive description of the material can be given in the comment field. The date will appear automatically. Furthermore, it is possible measured MFR or MVR values associated with the test temperature and the test weight entered.
Thermodynamics
In the Thermodynamics tab you can enter the thermodynamic material data. These are:
- Crystalline Melting Temperature / Glass Temperature
- Melting Enthalpy
- Specific Heat Capacity
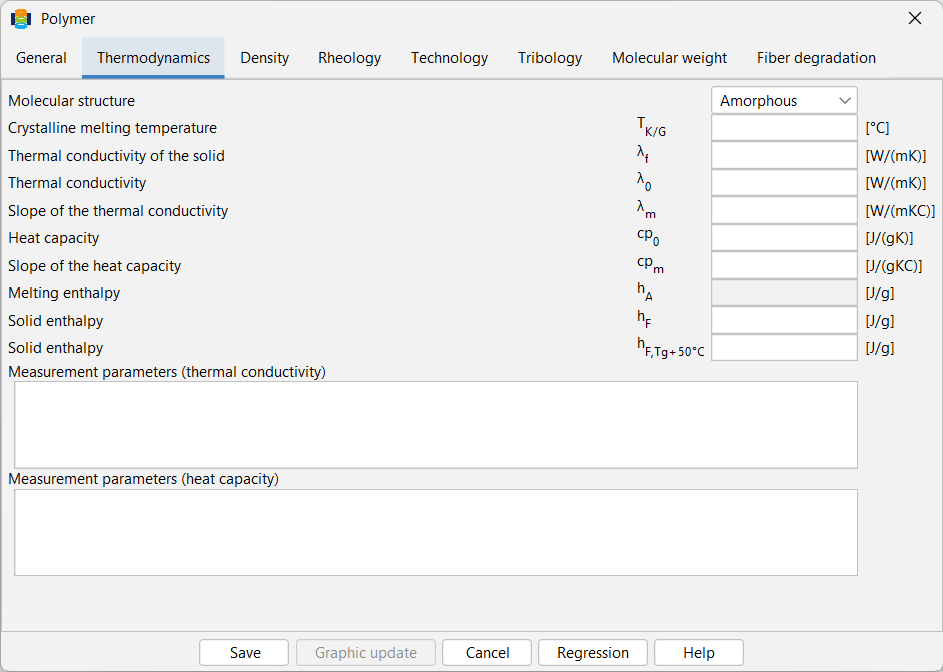
The corresponding values needed for further calculations and graphical illustrations are given in the input area on the right hand side of the mask.
The tab Thermodynamics contains the field for the Molecular Structure (amorphous or partially crystalline) which can be found on the lower right side of the window. This is dependent on the material type and will be adopted automatically via the created material type before.
If it does not work automatically, the user should do the input manually. This can be done by clicking with the arrow inside the area which marks the structure. If the program still refuses the right molecular structure, it is possible that this kind of material has already been saved, but within a different molecular structure. Then the program PAM will resort to previous data within the input mask Material Type. If, for instance, the program knows the kind of material HDPE and the amorph structure, then PAM will access inside the mask material data the tab Thermodynamics and cannot be changed by the user. The wrongly named structure can only be changed within Material Type. In the Density tab, the density data can be entered.
Density
Information regarding density can be entered on the Density tab.
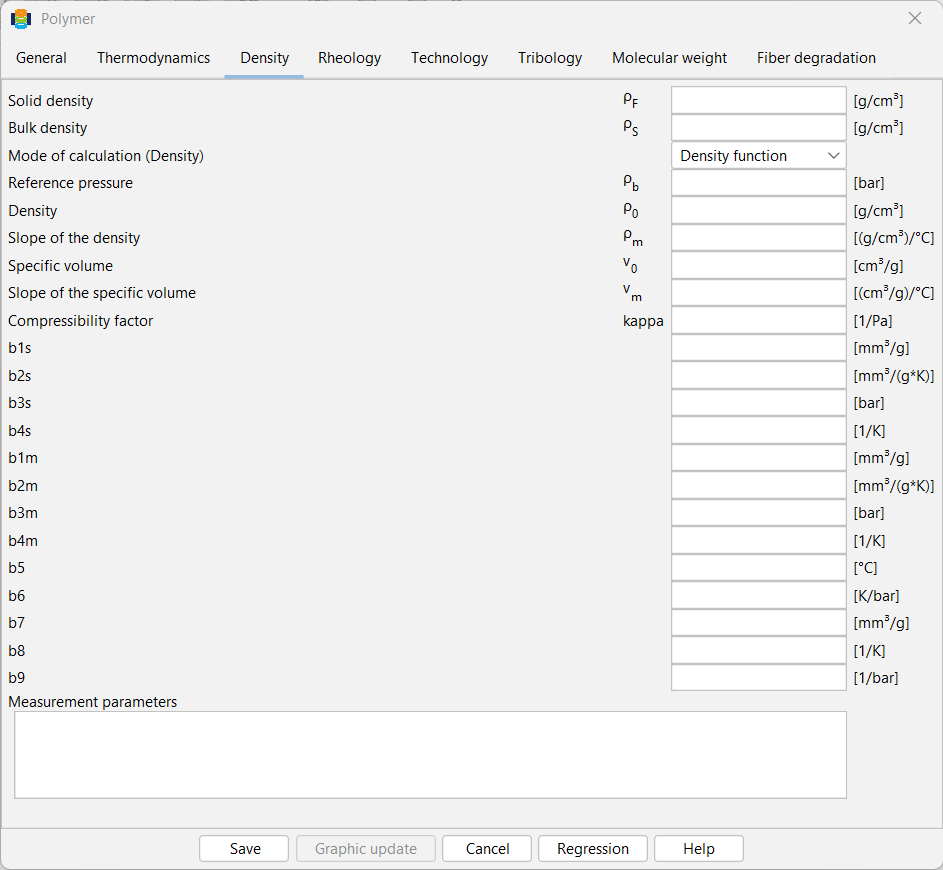
The Density tab contains input fields for, for example:
- Reference pressure
- Specific volumes
- Densities
- Bulk densities
- Solids densities
By clicking on the arrow in the Calculation type area, you can determine whether the density function or volume function is used as the basis for the calculation.
Rheology
The data required for rheology can be viewed under the Rheology tab and entered there by the user.
Here, for example, values for
- Slope
- Exponent
- reciprocal transition shear rate
- standard temperature
- activating energy
- zero viscosity, etc.
For the viscosity law you can choose between Carreau, Yasuda, Power law and Polynom law. For the temperature law you can choose between WLF ($T_b$, $T_s$), WLF ($C_1$, $C_2$), Arrhenius ($E$, $T_b$) and Isotherm.
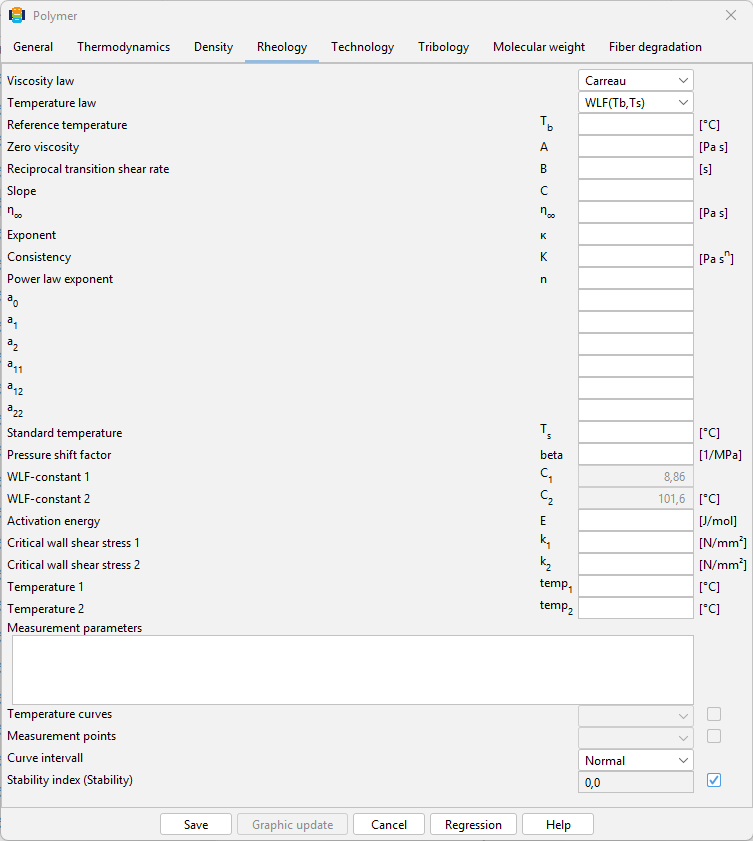
The temperature and viscosity approach must be selected in the respective range, e.g. WLF temperature approach ($T_b$, $T_s$) and Carreau viscosity approach.
To determine the characteristic values of the different models, a regression based on measurements can be used. For some models a reference temperature needs to be defined. As a reference any temperature at which a measurement exists can be chosen.
If it is needed to evaluate a series of measurements by means of implemented regression equations, the reference temperature should correspond to the test temperature.
Technology and Tribology
The Technology and the Tribology tab contain data to describe the tribological data and some data to describe the pellet dimensions.
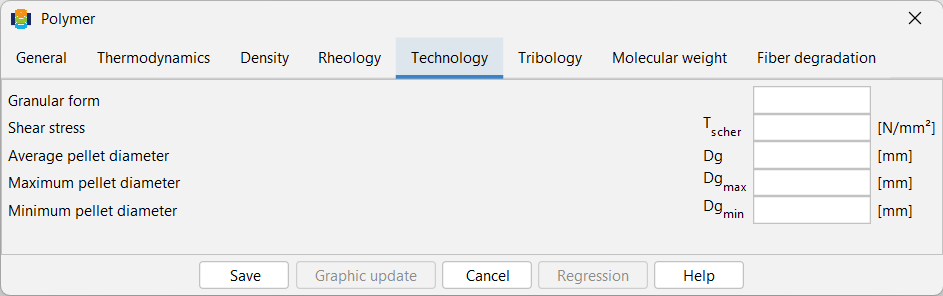
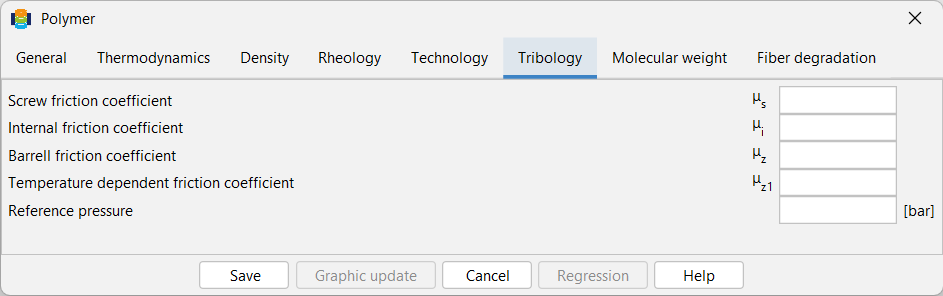
By confirming with the button OK, the tab where you inserted data closes and all data is saved. The button Update saves all data, but does not close the tab. The saved data are the basis for the diagrams and the following calculation. The button Cancel closes the tab but does not save the data.
It is possible to edit and change previously entered data. To do this, simply choose the name of the material from the drop-down box in the main window of PAM and then press Edit.
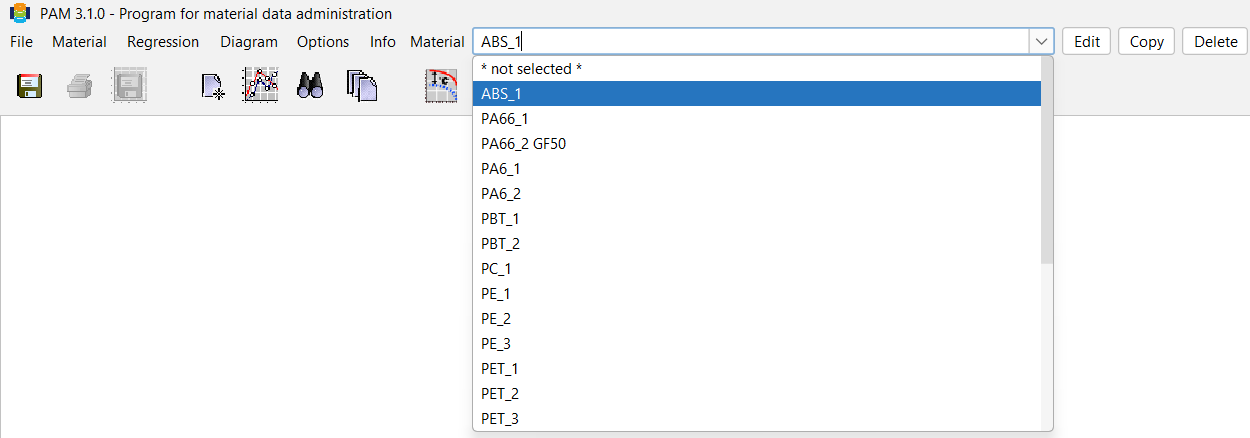
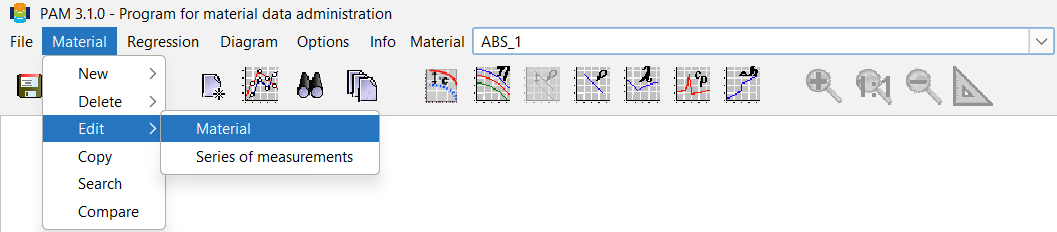
A second possibility to open the tab to insert or edit the material data is to choose Material > Edit > Material.
If values are entered in a field that are not valid, the field is marked in red as the user presses the OK button. It is not possible to save the data in the database as long as the material data set contains data that is not valid.
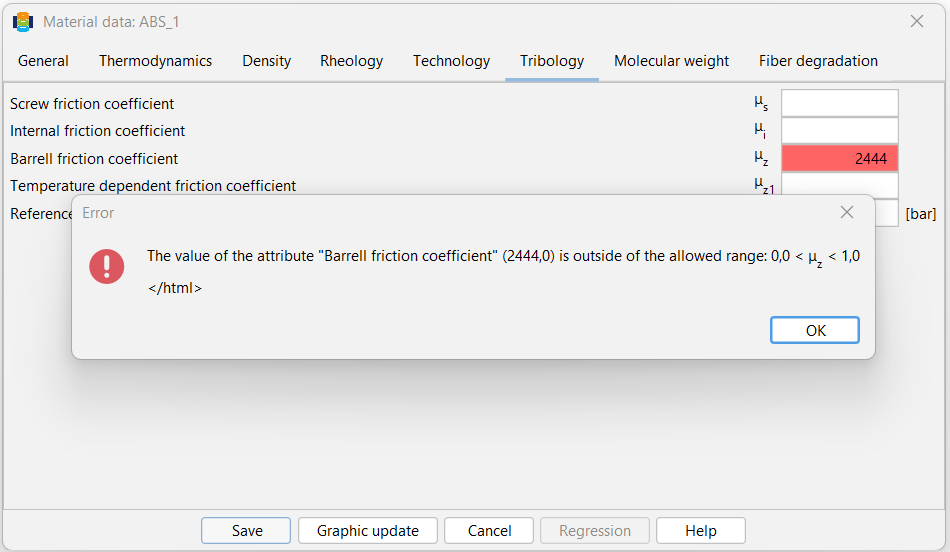
PAM only saves all data after entering the values correctly and completely. Then it is necessary to press the OK button.
It is also possible to show a material preview by the material checkbox. For this, either one of the contained entries must be selected or the checkbox itself with the mouse pointer. Then all basic properties of the material, which are also included in the first window of the material dialogue are shown. Up to this, there is also the possibility to reduce the preview down to the material name and type (short preview) or to deselect it completely.
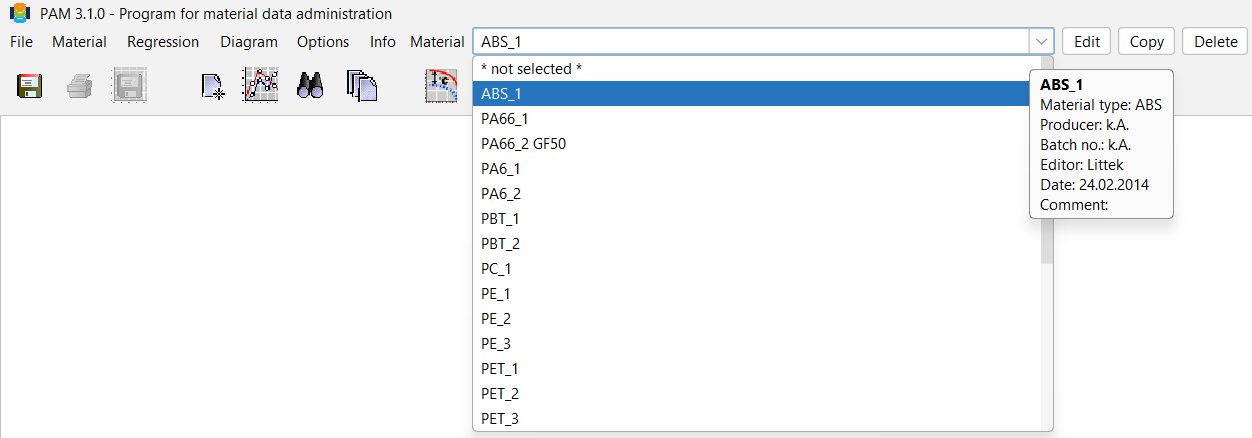

Define a new Filler
In order to define a new filler, select Material > New > Filler.
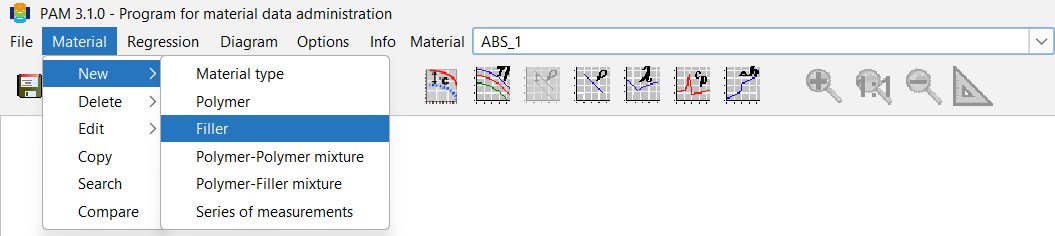
The Material Data window opens. Here, you can gradually enter all existing data required for further processing. The following illustration shows the individual tabs of the Material Data mask at the top, starting with the General tab. In General, the material name, material type, manufacturer, processor, batch number (if applicable) and comment must be entered manually. The date appears automatically. In addition, values for the MFI and MVR of the filler can also be entered here. If required information is missing, such as the name of the manufacturer, the PAM programme will notify the user when closing the Material Data mask.
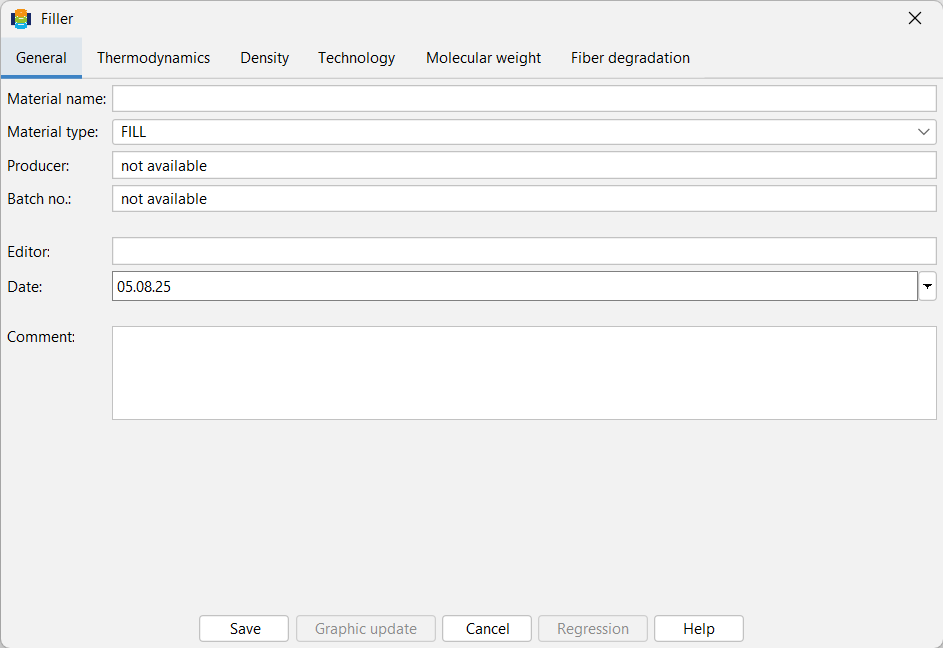
In the Material type field, the type of material, in this case a filler type, is specified in the drop-down menu. This requires that the material type has been created and saved in advance under Create new material type. It should be noted once again that creating a new material type serves as an essential basis for all other functions of the PAM programme. PAM uses the previously saved material type data; the user cannot manually enter data in the Material type field.
The following figure shows the other tabs of the Material data mask, which must be filled in if they are important for further processing or calculations.
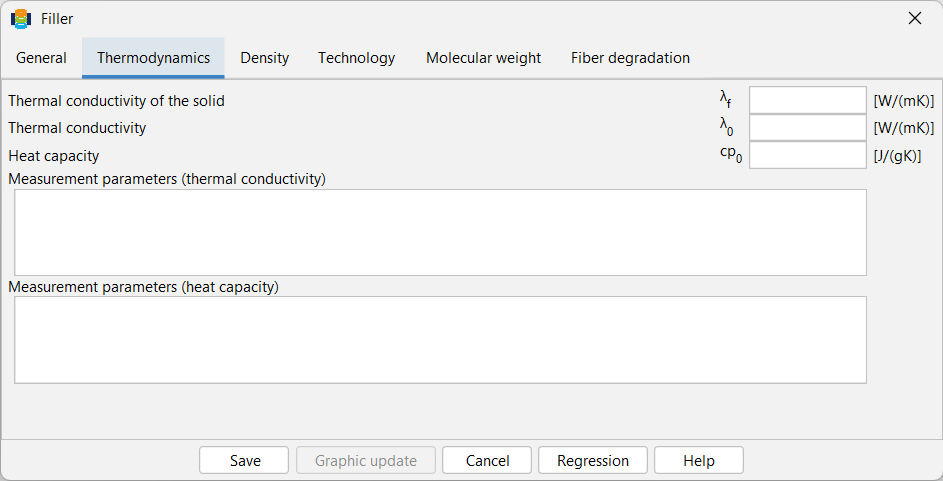
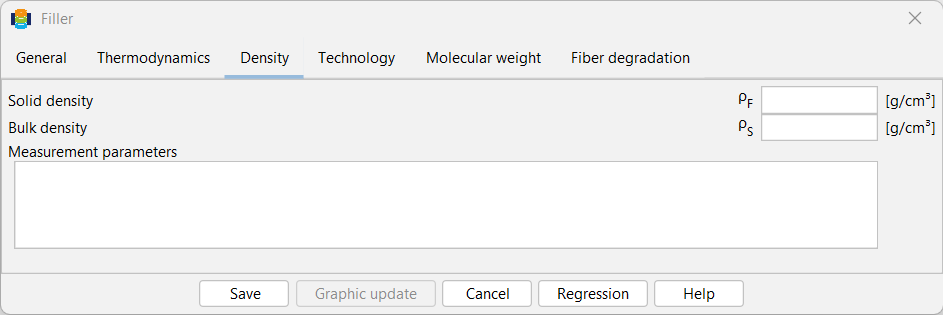
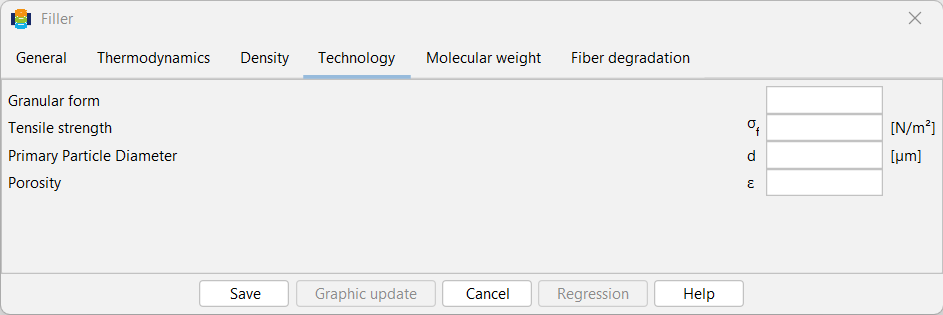
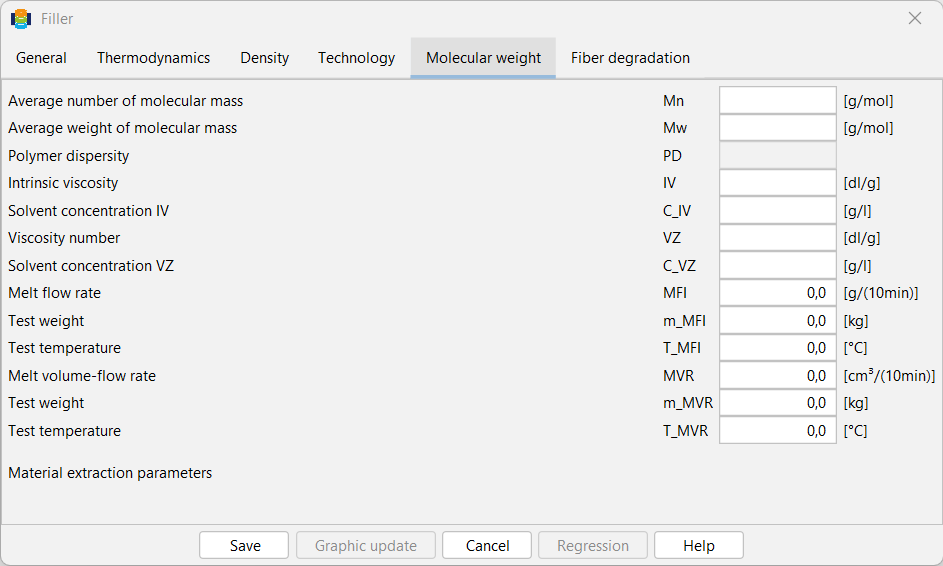
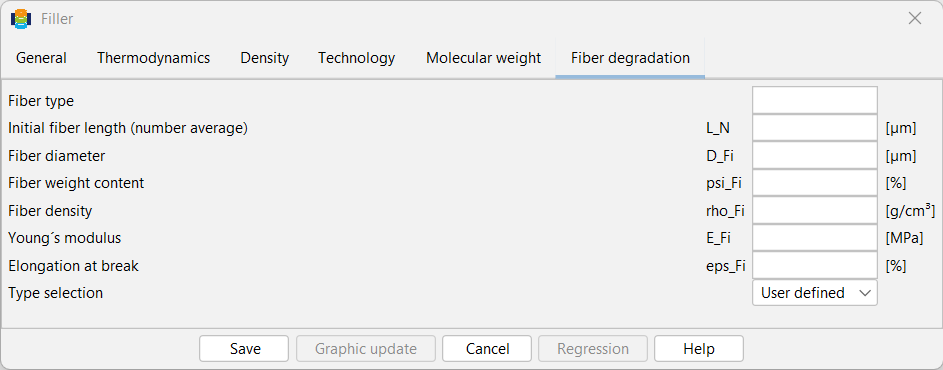
When clicking the OK button, the tab material data will close.
Definition of Polymer-Polymer Mixtures
In order to define polymer-polymer mixtures select Material > New > Polymer-Polymer Mixture.
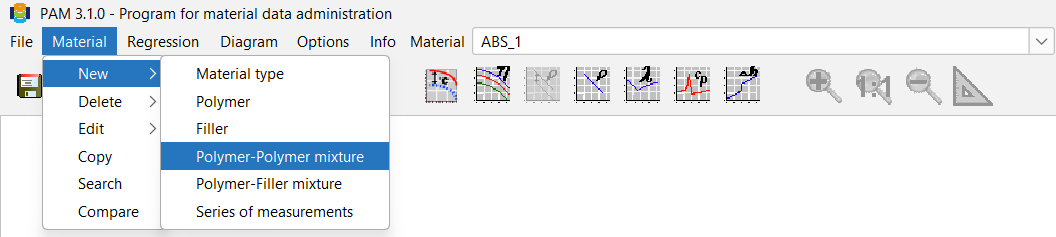
In Material data for polymer-polymer mixtures, the user must fill in the tabs General, Rheology, Tribology and Molecular weight. The data listed in the following figure is entered in the General tab. In the Material A and Material B fields, the two polymers are selected and then the weight proportions are specified.
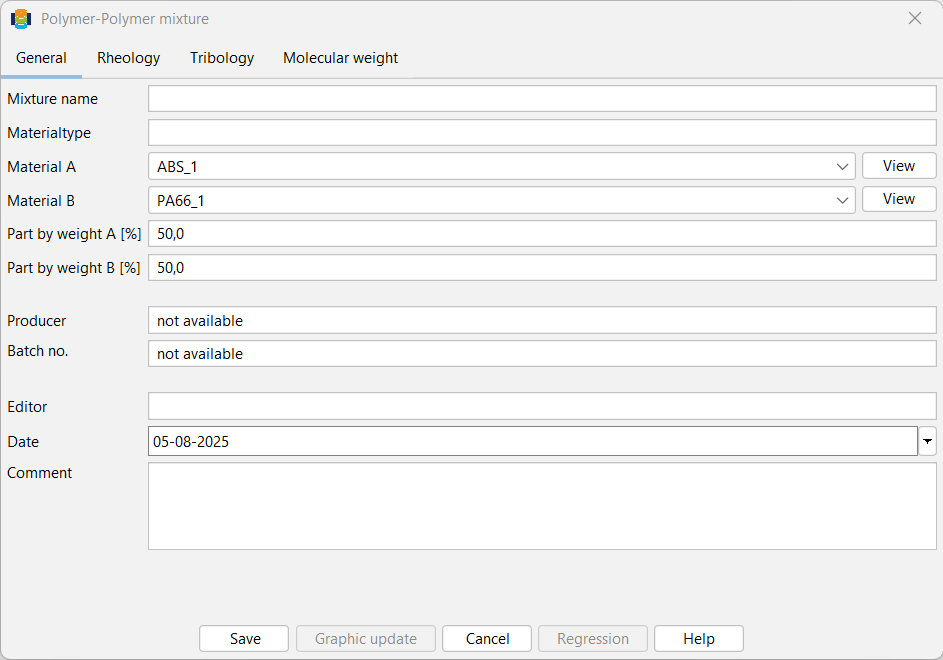
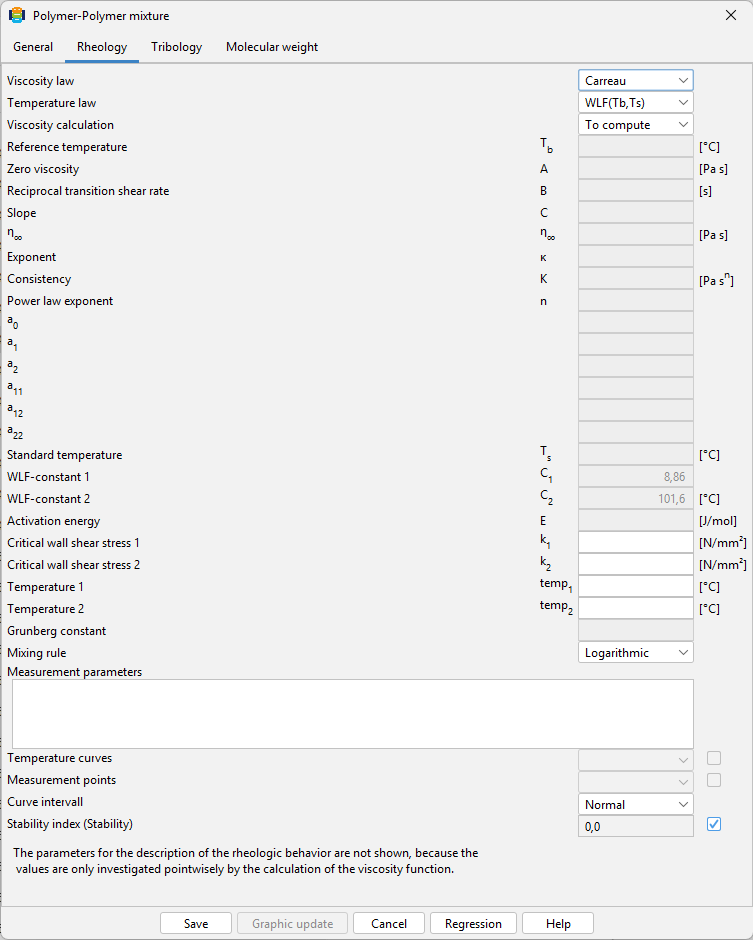
In the Rheology and Tribology tabs, the PAM user can enter the necessary data as required or leave it blank. If no data is entered, the viscosity is calculated using the specified mixing rule.
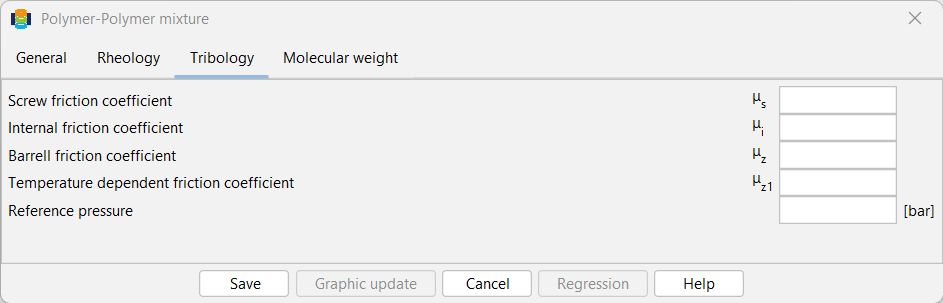
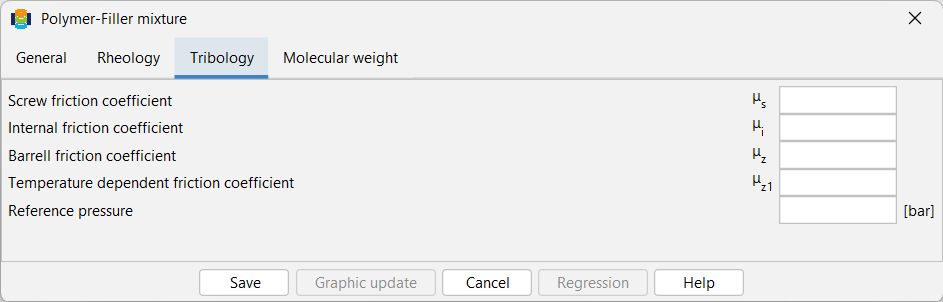
The Tribology tab contains the same input options as before when creating a simple polymer.
Definition of Polymer-Filler Mixtures
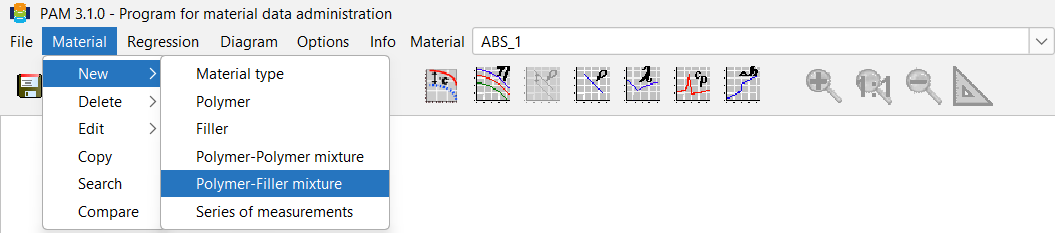
A polymer filler mixture is created using the function New > Material > Polymer filler mixture.
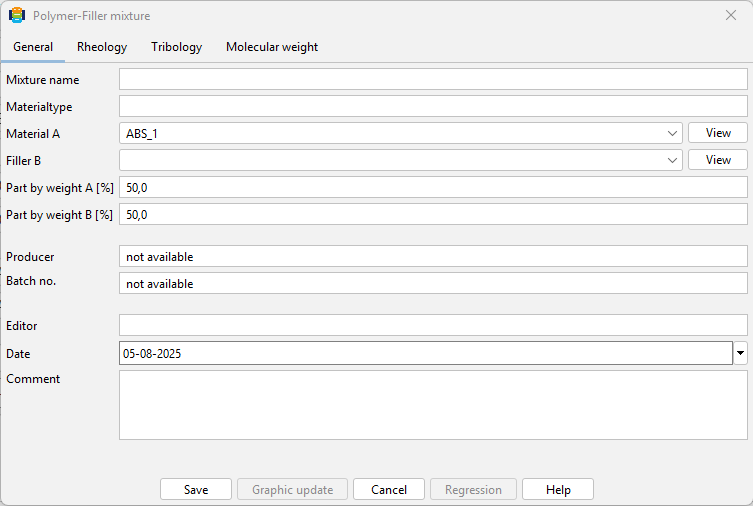
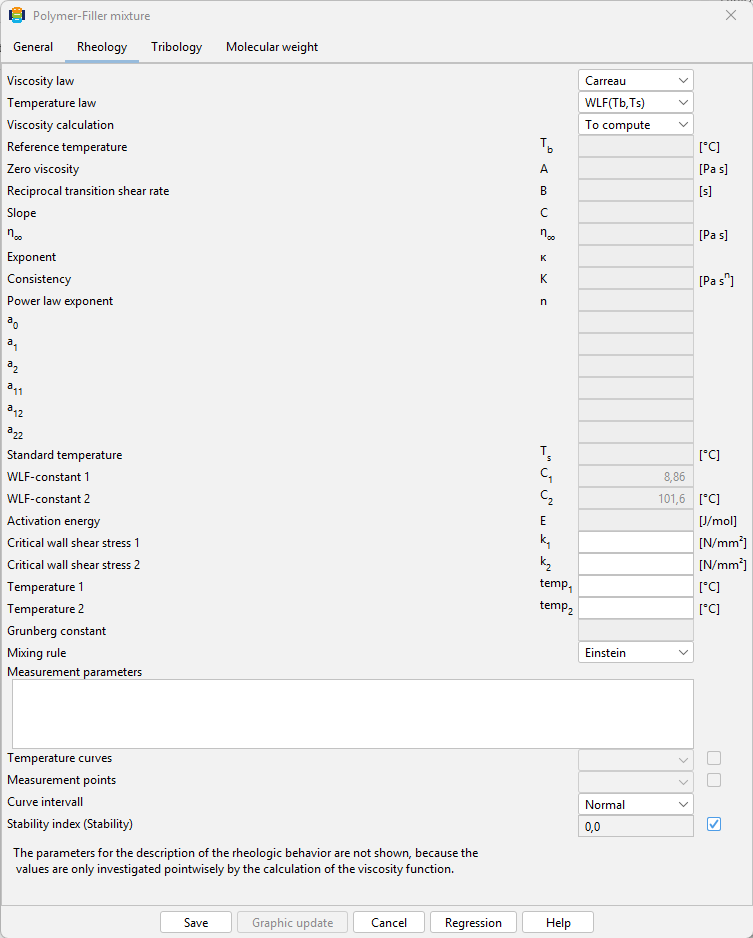
The window for entering material data for the material type polymer filler mixture has three tabs, as with polymer-polymer mixtures. The PAM user must specify the weight proportions. Values can be entered in the Rheology tab or left blank. If the data is not entered, the required parameters, e.g. Carreau parameters, will be calculated later in REX or SIGMA.
Definition of Measurements
When a new material is entered, the corresponding measurement data, such as p-v-T data, is entered or imported. Only then can a regression be performed using this measurement data.
The menu function Material > New > Series of Measurements creates a new measurement series window for the previously selected material.
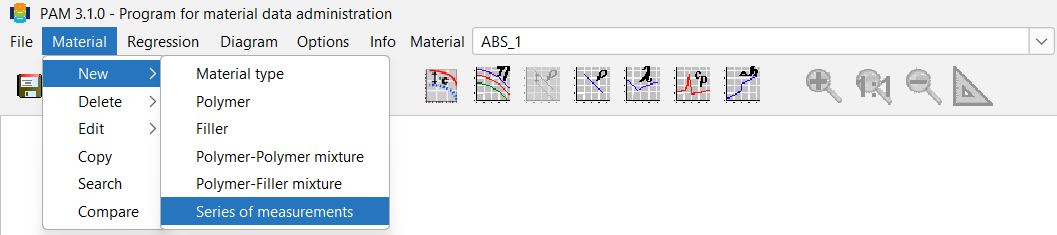
The Measurement series window is opened for editing. Here, the Name of the measurement that the user wants to perform (e.g. viscosity curve), Editor, Comment (if applicable) and Measurement type are specified. The Measurement type (viscosity data, … or free measurement type) must be specified before entering the data. With the exception of the free measurement type, each field can only be selected once for the same material. If two different viscosity measurements are to be saved, one data record must be stored as a free measurement type. The material designation appears automatically in the Material field.
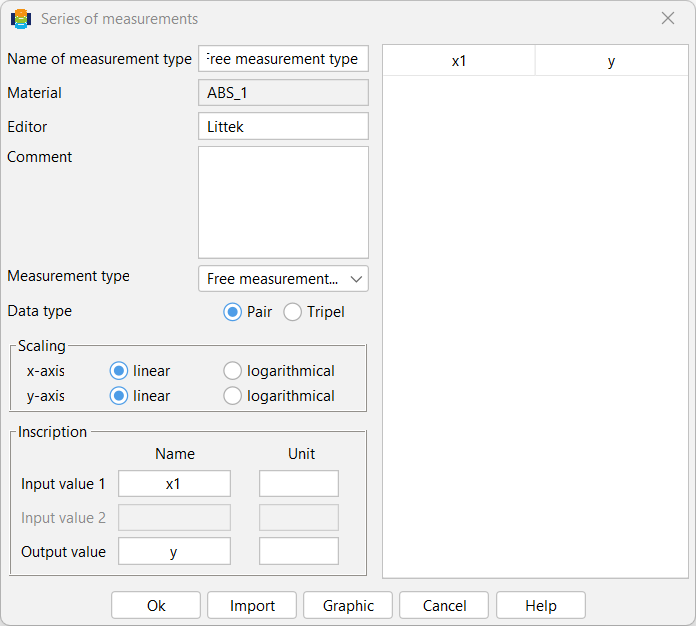
Data type, scaling and inscription also adjust automatically after the measurement type has been determined in this mask for measurement series. The columns where the values are entered are located on the right-hand side of the window. The respective data can be entered there or imported using the Import button (more information under the Editing measurement series menu). The data is saved by clicking the OK button.
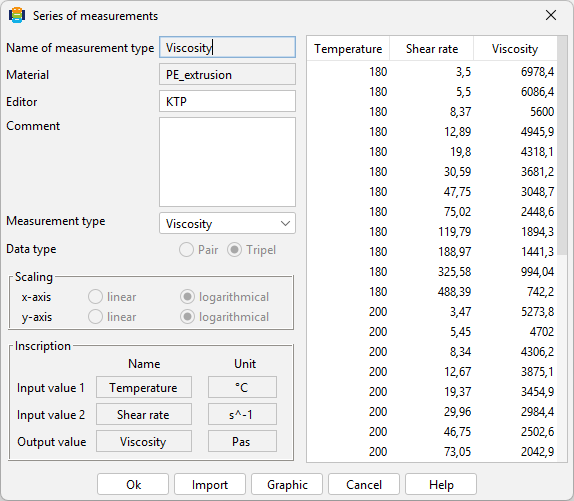
The Edit measurement series tool can be used at any time to access the measured values and make any necessary edits.

The tools listed in the menu, e.g. Rheology, can be used to call up the curves stored for a material. If a measurement series has not been imported for a material or if data required for the regression of the respective curve is missing, the curves are not displayed and the tool is shaded grey.
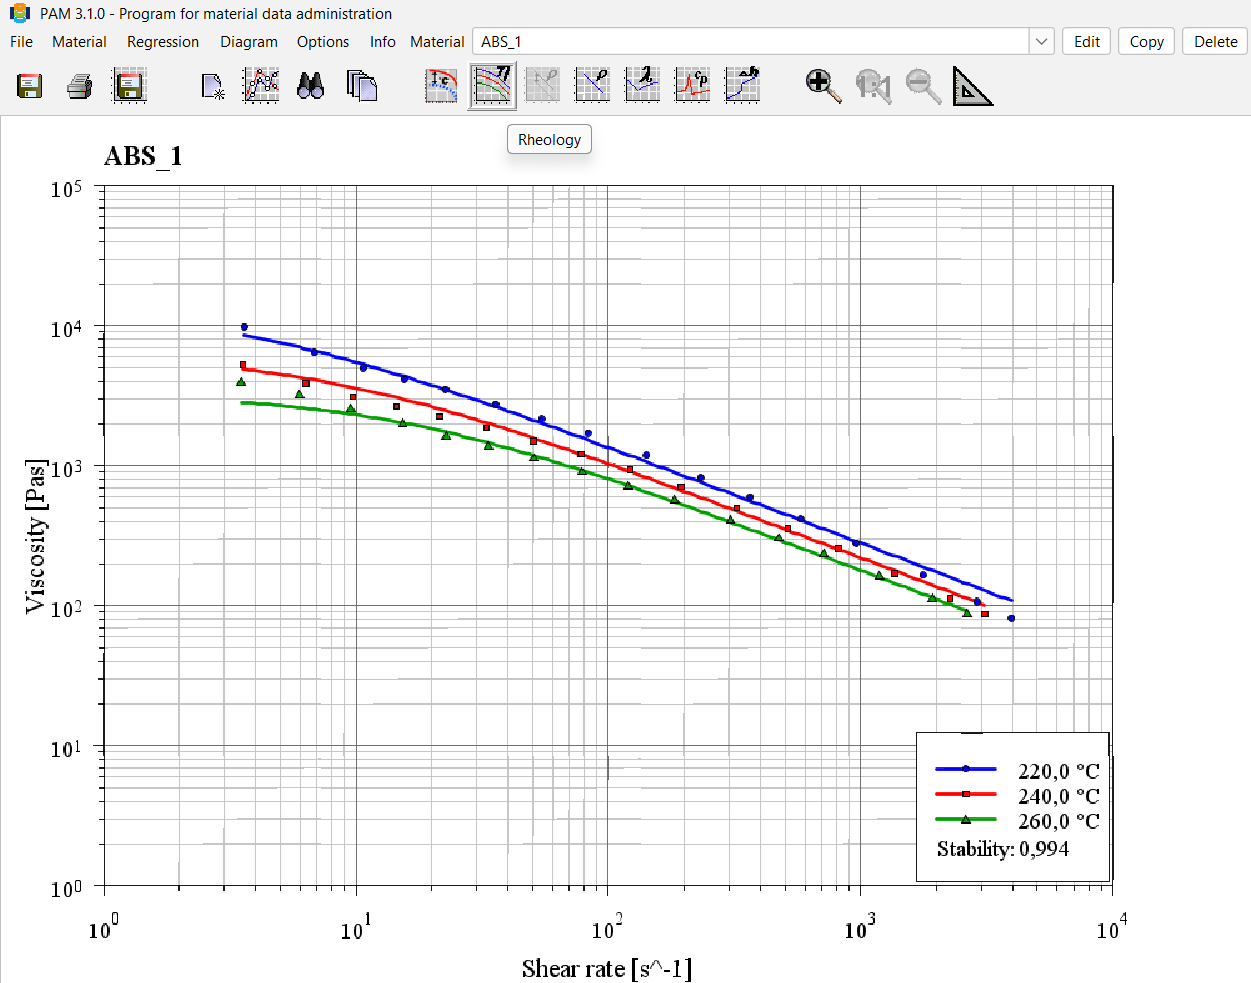
If regression is to be performed or adjusted at a later date, or if the parameters of the individual tools Thermodynamics, Density, Rheology, Technology, Tribology, Molecular Weight and Fibre Degradation are to be changed, this can be done using the Edit button to the right of the material selection. Clicking on this button opens the Material data window with the corresponding tabs.
The following steps can be carried out on the Rheology tab:
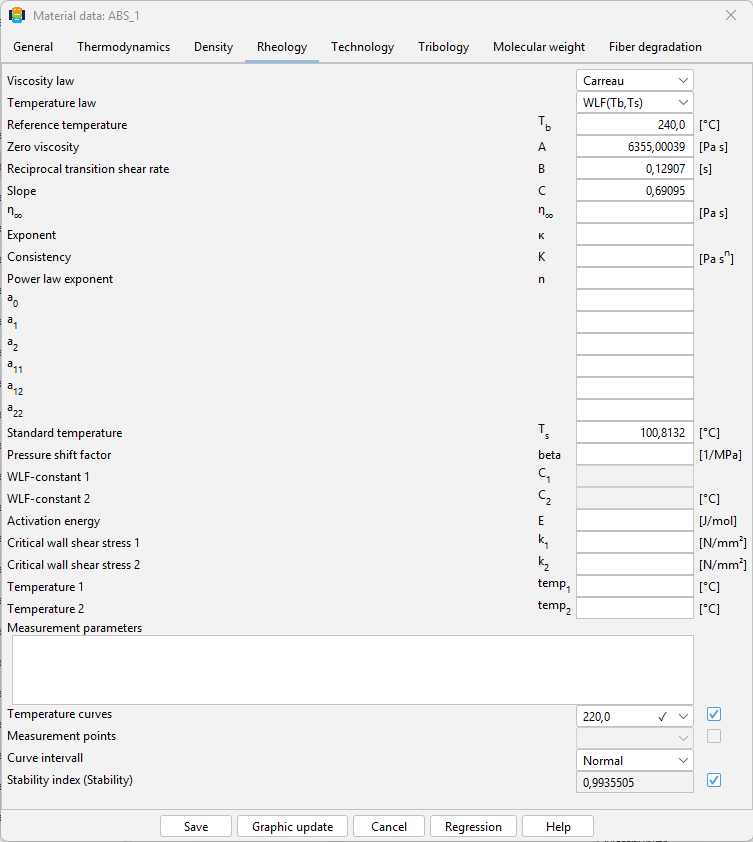
The rheological measurement points are evaluated in the Rheology tab of the Material data window. Before regression, a viscosity and temperature approach as well as a measurement temperature as the reference temperature for the evaluation must be selected. Clicking on the Regression button performs the regression. Regression curves are plotted through the measurement points and the corresponding values (e.g. Carreau parameters A, B ,C) are displayed in the tab.
Under the menu item Temperature curves, individual or all curves or measuring points can be hidden from the graphical display.
Under the option Curve interval, you can set whether the regression curve is displayed in the area of the measuring points or should continue further to the left and/or right.
After confirming with the Save button, the mask closes and the viscosity curve can be displayed after clicking on the Rheology drawing tool.
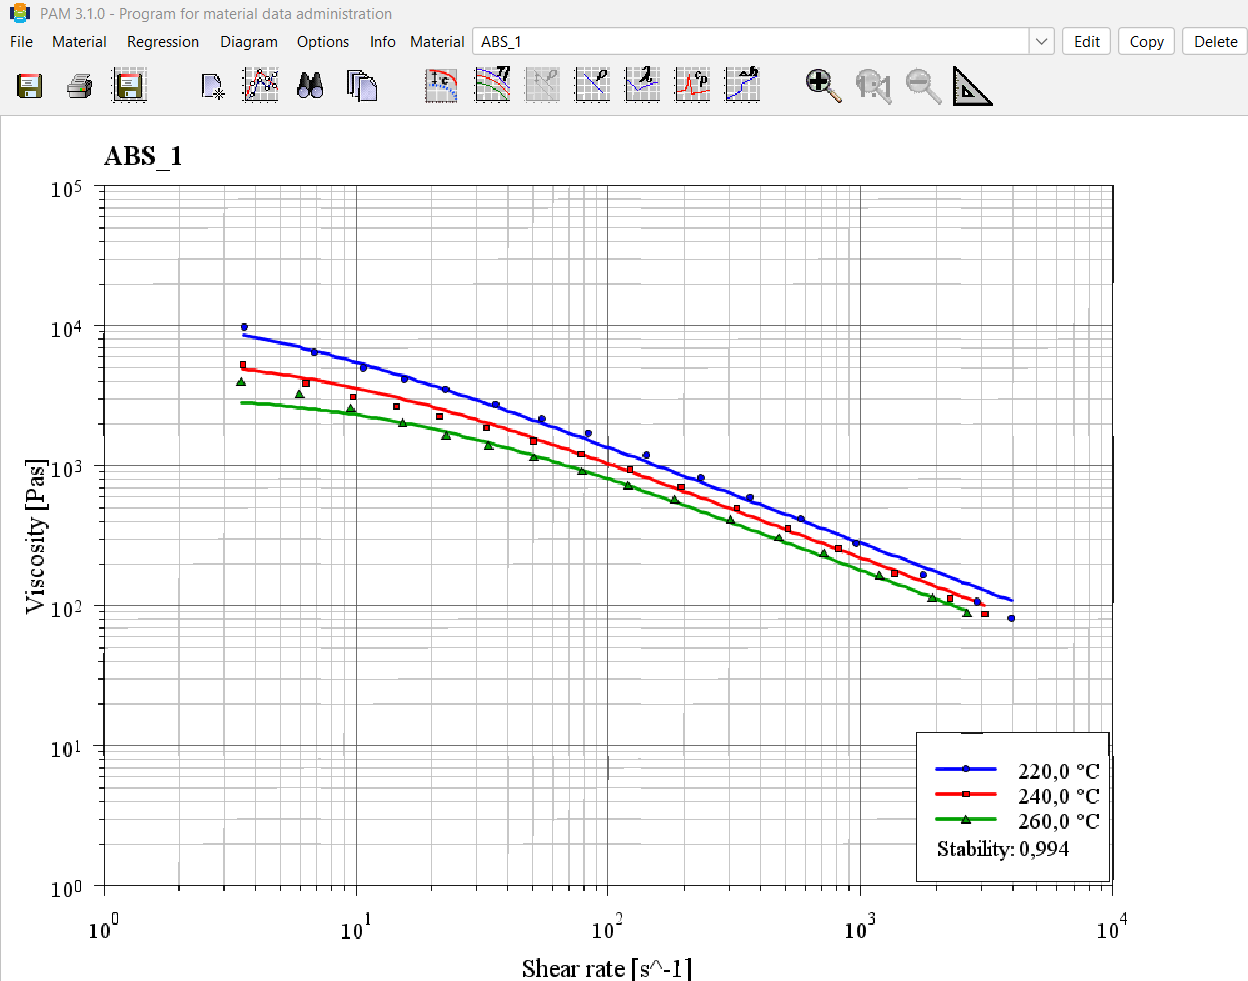
With the Measure tool, any point in the graph can be selected by clicking on it. The values for this point then appear at the bottom left under Measuring Point.
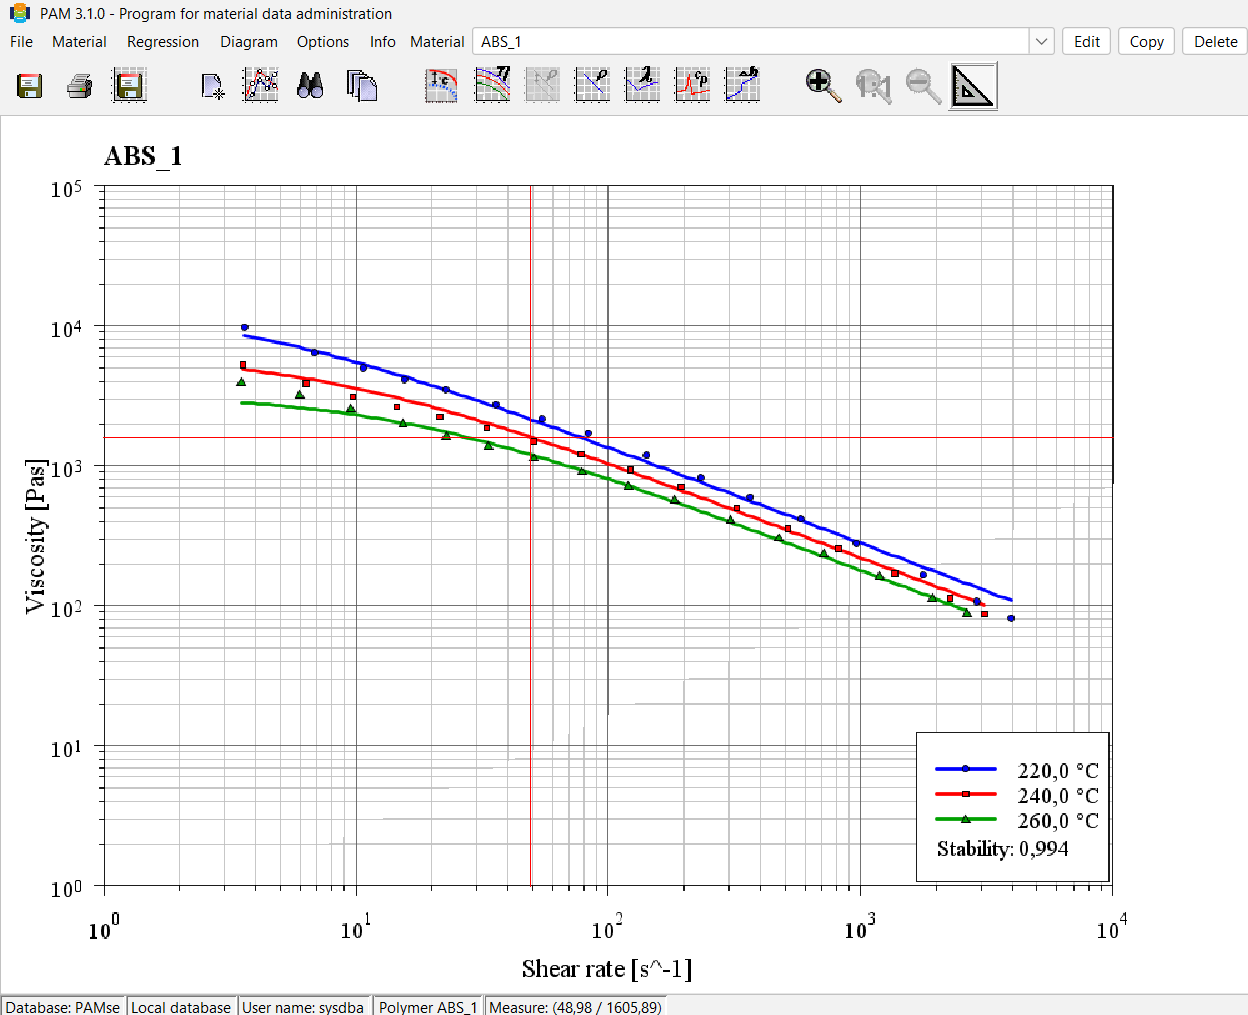
The procedure for further measurement series (density, thermal conductivity, enthalpy, …) is the same as the procedure described here for rheology. If a measurement series is not available or regression is not possible due to incorrect data, this is indicated in PAM by a grey shading of the respective tool for curve display.

Delete data
Delete Material Types
The Delete function is located under the Material menu item. If the user wishes to delete a material type, the corresponding window appears when they select Material type under the Delete function.
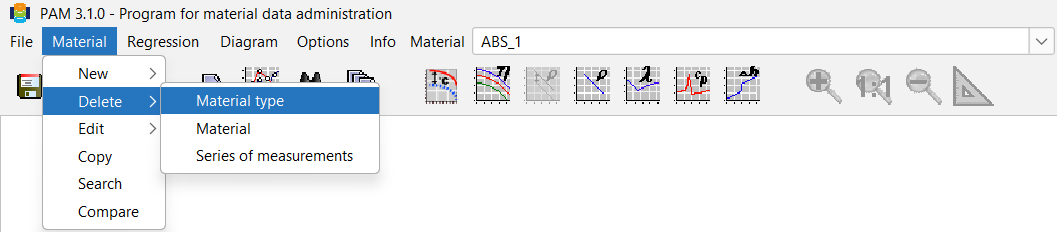
Delete Material Data
The process of deleting a material is shown below. The material that is active in the Material selection window is always deleted. This can be done either via the material menu or via the Delete button at the top right.
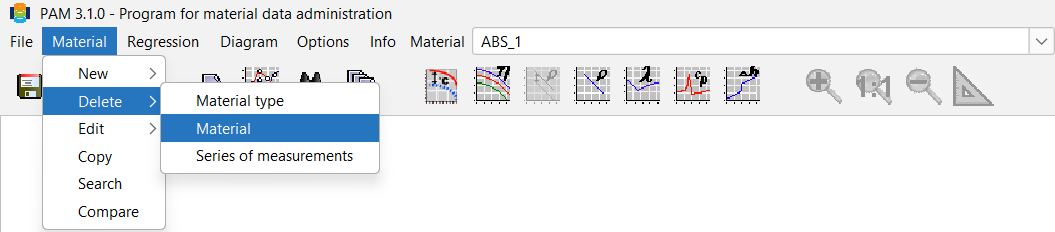
Delete a Series of Measurements
This function can be used to delete measurement series. To do this, the material to which the measurement series to be deleted belongs must be selected in the Material window.
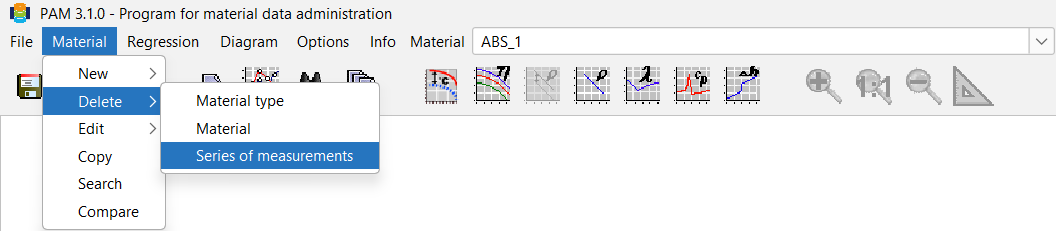
Edit data and measuerment data
Editing Material Data
The menu item Material with the function Edit from Material is shown in the following figure. This function allows PAM users to access the material data and make changes there. This has the same effect as the Edit button next to the material selection window. The window for entering general data, thermodynamics, density, rheology, technology, tribology, molecular weight and fibre degradation opens. The data entered when creating the material can be changed.

Editing Series of Measurements
If the PAM operator wishes to edit measurement series for a material, they can use the Edit function in Measurement series under the Material menu item to call up the measurement series and add to or change this data. If the user intends to change the measurement type, e.g. from viscosity to density, the right-hand side of the Measurement Series screen will adapt to this change.
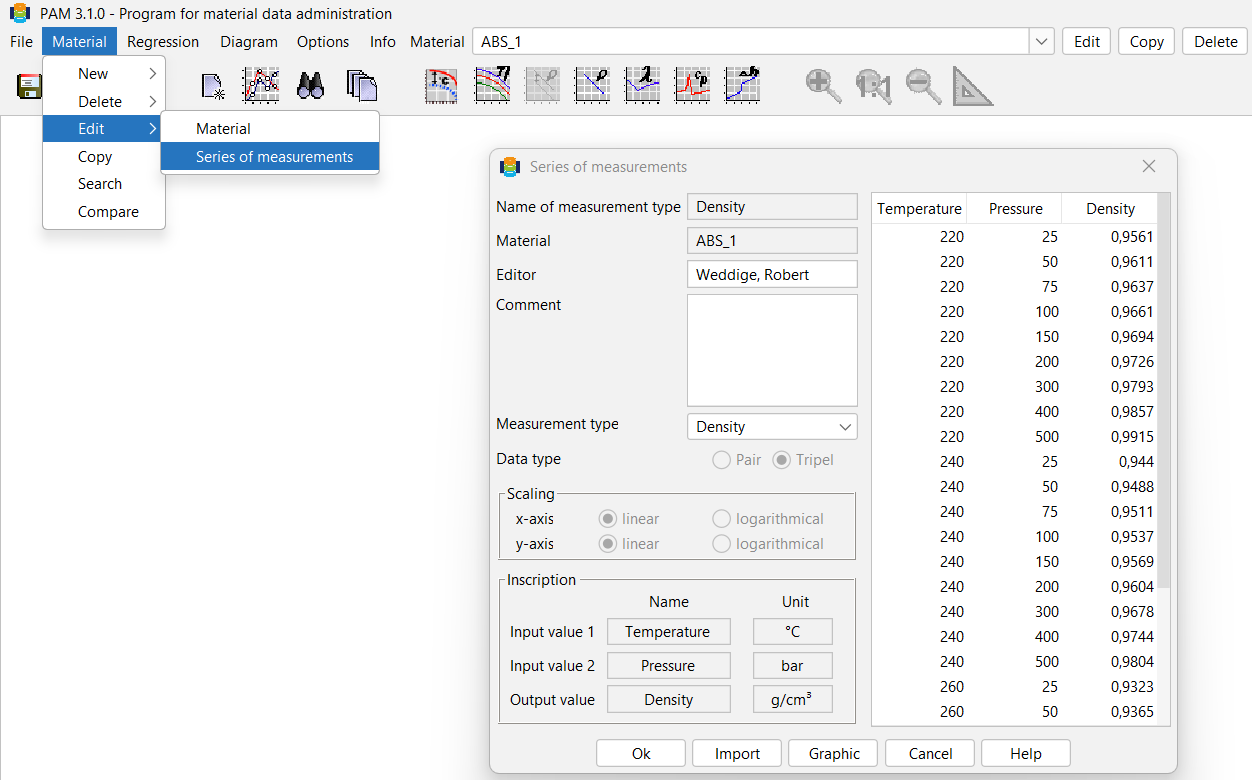
At the bottom of the measurement series screen, there are five different buttons that PAM users can work with. If data needs to be imported from another source, the user can click on the Import button. A window will appear in which the user must specify the folder containing the desired data.
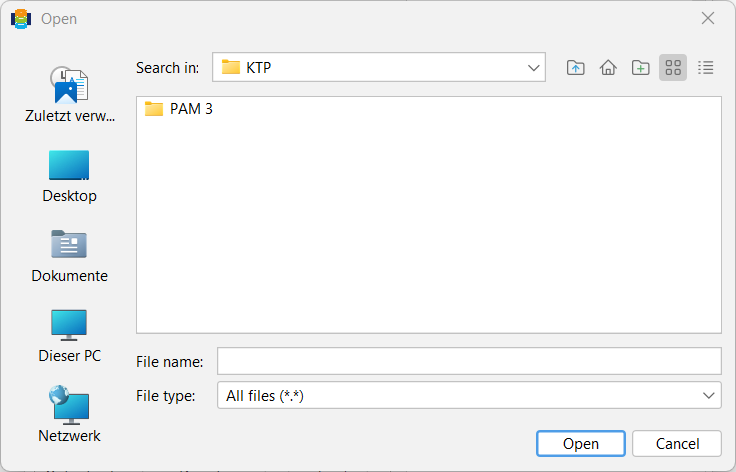
Copy data
It is possible to copy the selected material via the menu item Material and the function Copy or by pressing the Copy button on the right. For this purpose, a new material name must be specified, to which the values of the existing material are then transferred. However, this new name must not be the same as the original name.

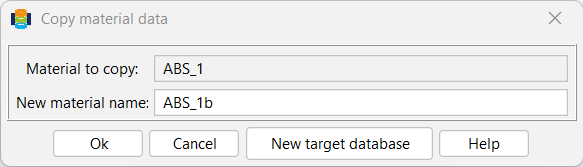
This dialogue box also offers the option of transferring selected material to another target database. To do this, first select the New target database button. The input mask will then change as follows:
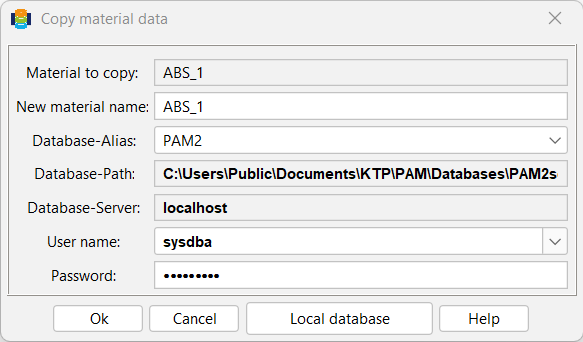
Now you can select the appropriate target database. It may be necessary to adjust the user name and password so that the copy process can be carried out successfully. In contrast to the standard dialogue box shown in the previous figure, it is always assumed that the material name of the copy matches that of the original. However, it is also possible to customise this.
Search material
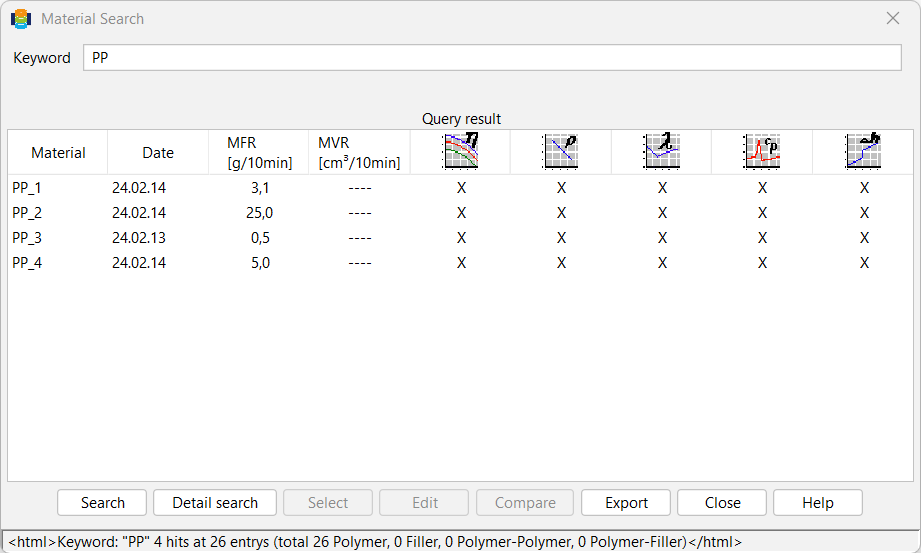
In the Material bar, you can enter a search term such as PP directly, and the material that is listed first in the list with PP will be displayed.
For a more extensive search, you can start a search either via the Binoculars or the menu item Material > Search.
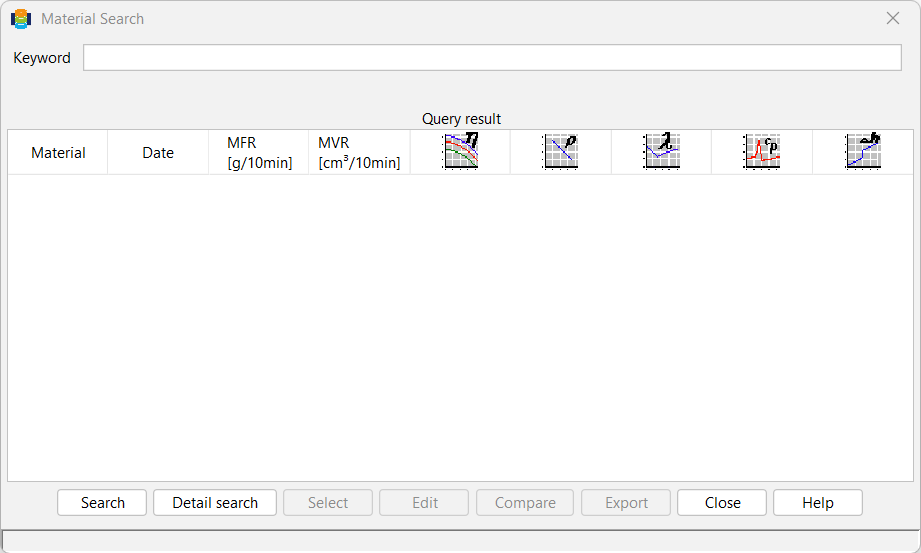
Usually, only individual keywords are searched for. A match is found, for example, if this keyword appears in the comment on the material, its name, its material type or the name of the manufacturer or processor. In this case, the corresponding materials are displayed in the list of search results after the search is complete.
It is also possible to start a detailed search. To do this, select the corresponding button.
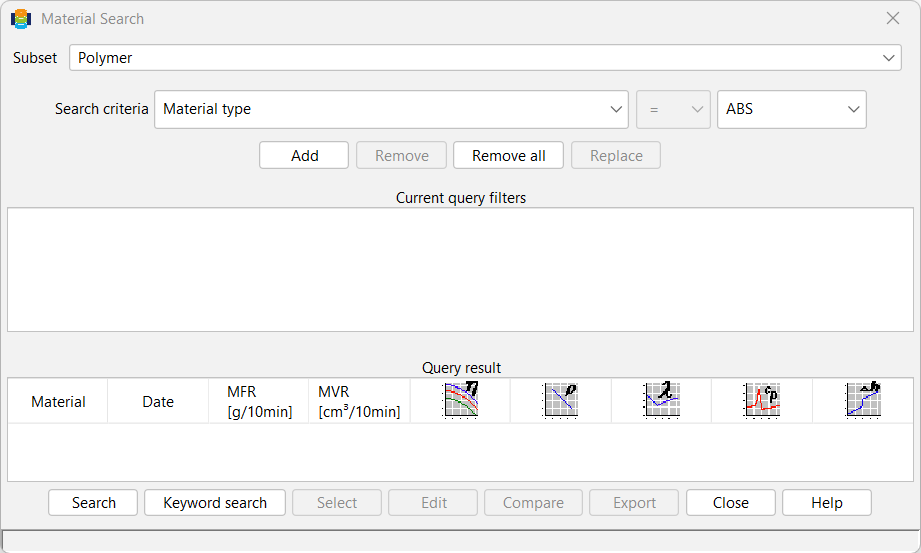
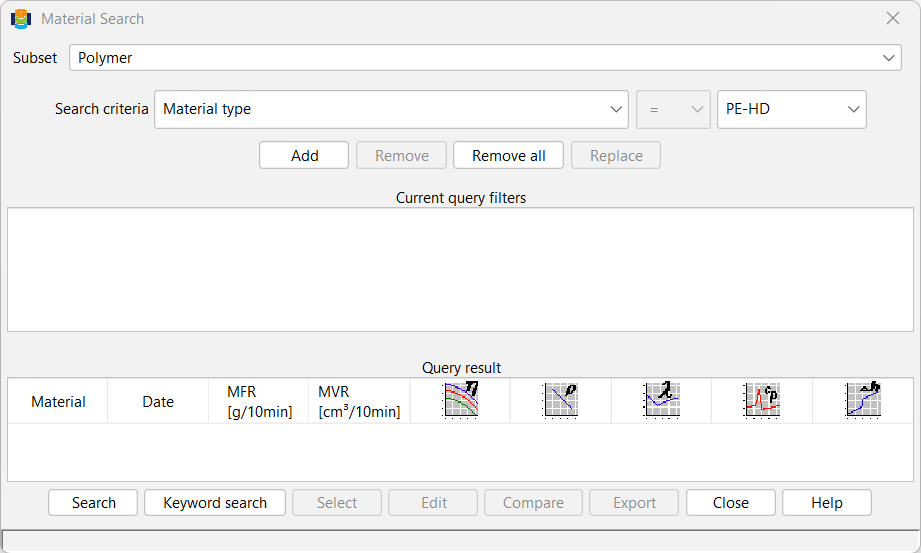
The search area is defined in the window; the areas Plastic and Filler are available.
Directly below the search area field, on the left-hand side, is the field in which the PAM user defines the criteria for the search. As can be seen in the figure above, there are several options available. If the PAM user selects the criterion Material type, they must specify the type directly opposite on the right-hand side.
If, for example, the material type PE-HD is selected, all material types of the type PE-HD are searched for and listed.
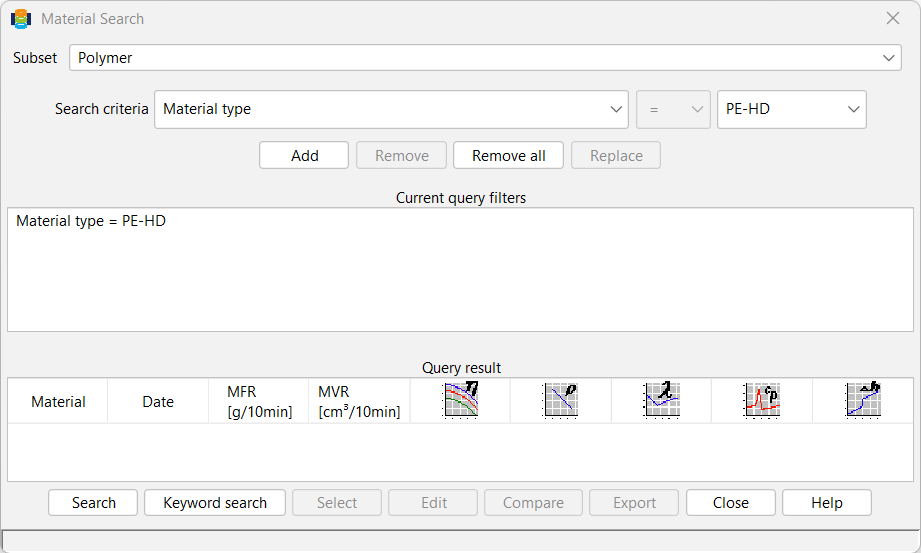
Once a search criterion has been specified and the Add button has been clicked, it appears again in the Search criteria area. In this way, several criteria can be specified for searching the database (e.g. HDPEs from a specific manufacturer).
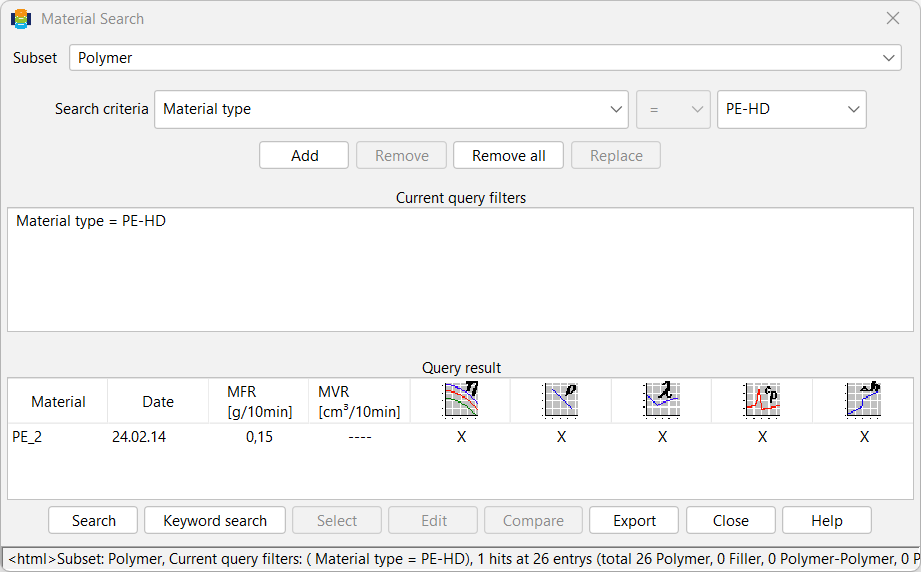
When the Search button is clicked in the Material Search window, the database is searched and all material names that match the selected criteria are listed in the Search Results field. As shown in the following figure, additional information such as the creation date, the MFI/MVR and the stored measurement series are also displayed for the search results. An X means that measurement values are available and a regression has been performed, and a 0 means that neither measurement values nor regression values are available. A — means that measurement values are available but are incomplete or a regression is missing.
Compare material
The database allows you to compare multiple material data sets. The maximum number is set to seven different material data sets.
There are two different ways to start a comparison:
- Directly via the menu Material > Compare and
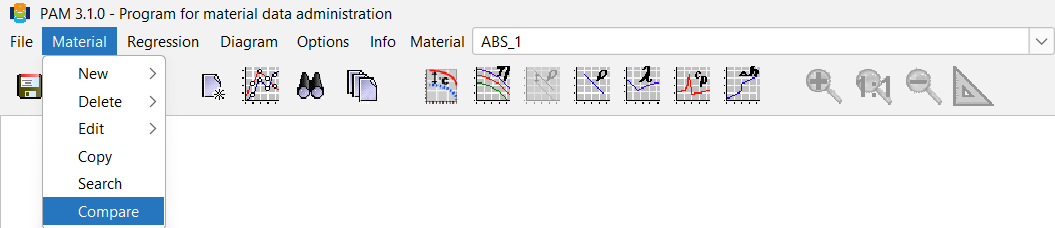
- via the menu Material > Search. If more than one material is found, multiple selection should be possible. The selected materials (max. 7) are automatically transferred to the comparison dialogue window.
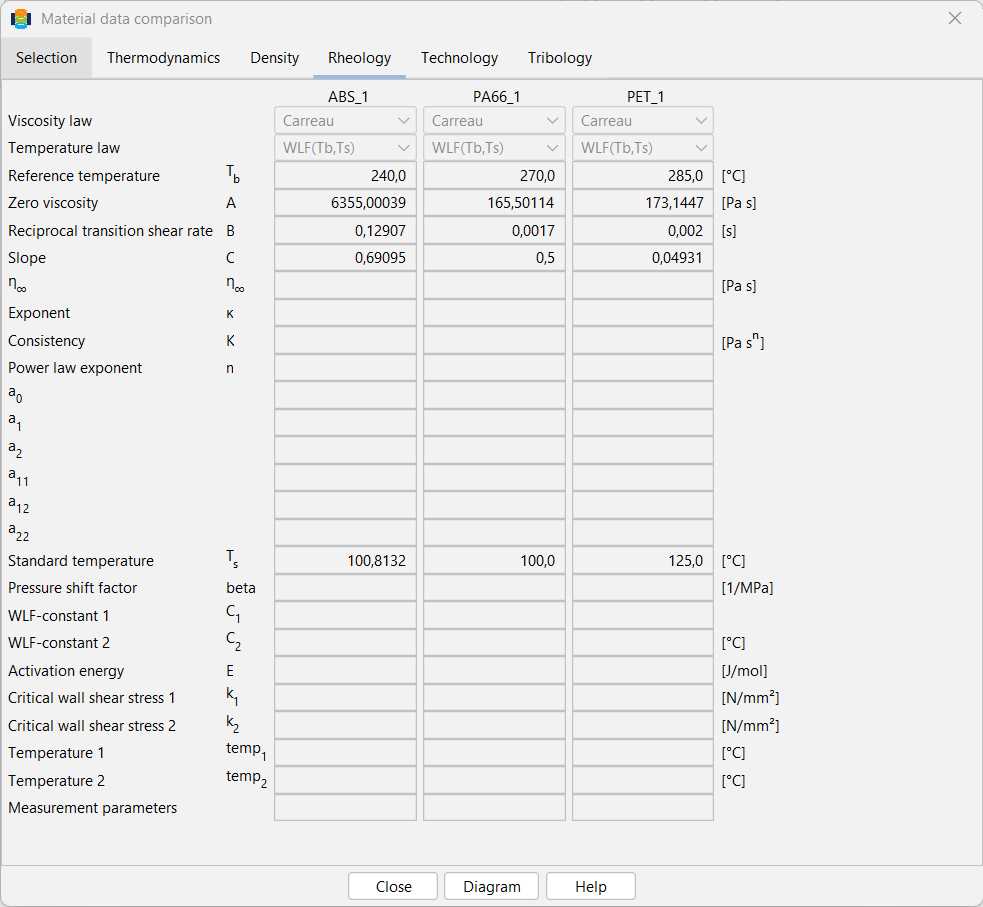
The comparison dialogue box is basically structured in the same way as the normal material data window.
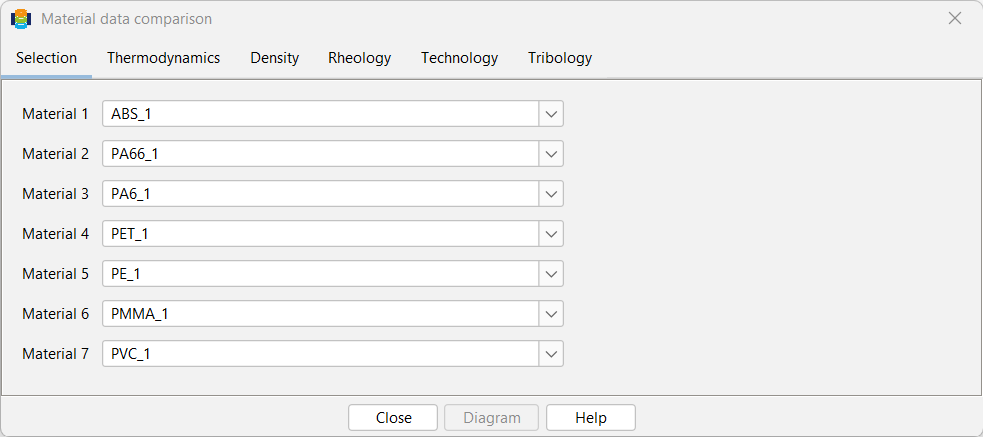
Up to seven materials from the database are selected in the Selection tab. The material data is compared in tabular form in the other tabs. The Graphics button displays the following equations (which must of course be available in the individual material data record) in a diagram:
- Viscosity
- Densitiy or specific volume (selection)
- Thermal conductivity
- Specific heat capacity
This means that no measured values are compared with each other, only the specified equations. A dialogue box is used to query the boundary conditions for the display (start and end values on the x-axis, reference temperature for viscosity curves).
The curves are labelled with the corresponding material name. Before drawing the viscosity function, a different reference temperature can be entered for each polymer.
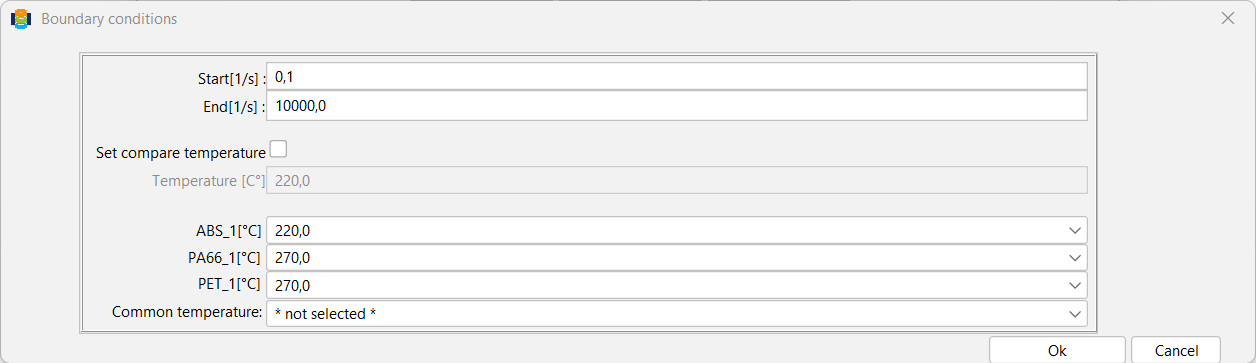
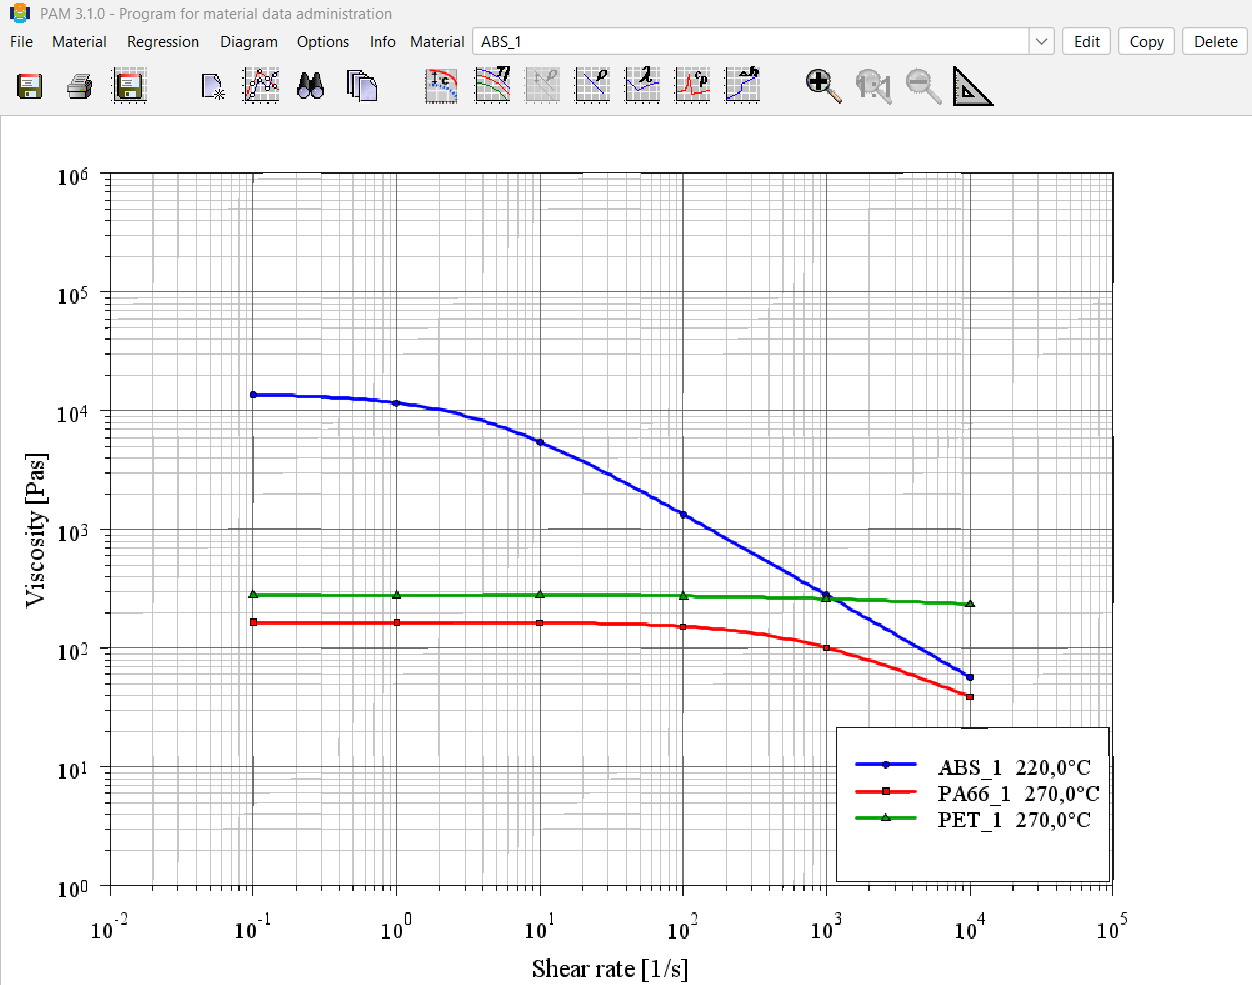
When comparing material data graphically, the desired temperature for rheological curves, for example, can be selected from a drop-down box. As with the comparison of material values, the reference temperature is selected by default here.